Build Your Own Gaming PC: A Beginner’s Guide
Building your own gaming PC might sound intimidating, but it’s absolutely doable – even if you’re new to the whole idea. In fact, assembling a PC can really be compared to putting together LEGO or IKEA furniture. With the right guidance and a little patience, you can do this. This comprehensive guide will walk you through why building your own rig is worth it, what components you’ll need, and how to put everything together step-by-step. Along the way, we’ll also share some tips and highlight how Xidax can make the process easier with our Easy Mode configurator, customization options, flexible financing, and friendly US-based support.
Want a video guide? Check out our latest build livestream and get inspired:
Why Build A Gaming PC?
What’s the big deal about building a PC yourself? There are plenty of great reasons enthusiasts choose to go the DIY route instead of buying a pre-built system. Here are some of the top benefits:
-
Complete Customization: When you build, you get to pick every part, from processor to power supply. This means you can tailor the machine exactly to your needs and budget – no paying for features you don’t want. Want a flashy RGB-lit case? Prefer a specific brand of graphics card? It’s all up to you.
-
Better Cost for Performance: You can often save money or get better specs for the same price by building your own PC. By shopping for deals on individual components, you might beat the cost of a comparable pre-built system. Essentially, more bang for your buck.
-
Upgradability: A custom-built PC is typically easier to upgrade. Down the line, you can swap out the GPU or add more RAM as needed, instead of having to replace the whole system. This future-proofs your investment, and saves you money on PC parts.
-
Learning Experience: The process of building teaches you a ton about how PCs work, especially which parts are compatible with one another. You’ll understand what each component does and how they all fit together. That knowledge can be valuable for troubleshooting and future upgrades.
-
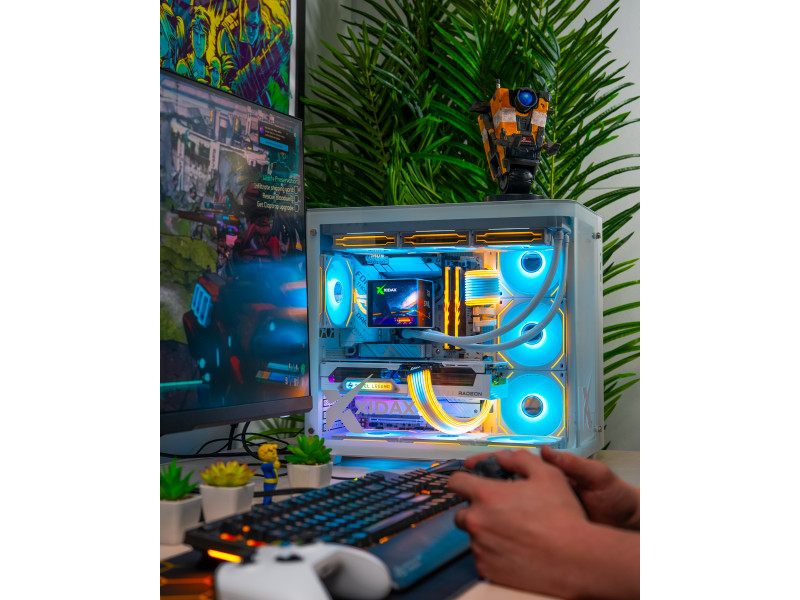
Sense of Accomplishment: Few tech experiences are as satisfying as pressing the power button on a PC you assembled and seeing all the components inside the case light as it boots up. It’s your creation from the ground up, and that’s incredibly rewarding.
In short, building your own PC is the best way to ensure your machine meets all of your personal preferences and needs. You’re in control, and you’ll end up with a rig tuned to the games you play and the performance you expect.
And don’t worry about difficulty. Even if you’ve never built anything like this before, the process can be broken down into simple, manageable steps. If you can handle a screwdriver and follow instructions, you’ve got this!
What You’ll Need: Core Components Explained
Before you can build, you’ll need to round up the essential components of a gaming PC. Each part has a role, and understanding them will help demystify the tech jargon. Here’s a quick rundown of the core components:
CPU (Central Processing Unit):
Often called the “brain” of your PC, the CPU handles all the calculations and instructions. A faster CPU means your computer can think and work through tasks more quickly. In gaming, the CPU impacts things like physics calculations, AI, and overall system responsiveness.
GPU (Graphics Processing Unit):
This is the graphics card, responsible for rendering images, videos, and 3D graphics. It’s the heart of a gaming PC’s performance. A powerful GPU lets you play modern games at high resolutions and frame rates with all the eye candy turned on. If you’re into high-detail or competitive gaming, the GPU will likely be the most important (and expensive) part of your build.
The latest models of GPU often come with the label GTX - "Giga Texel Shader eXtreme" or RTX - "Ray Tracing Texel eXtreme." Simply put, GTX GPUs improved graphics quality and textures, while RTX GPUs add a feature called "ray tracing." Ray tracing makes the way light reacts in your games more realistic and beautiful (god rays, anyone?), adding to your game-play experience.
Motherboard:
The motherboard is the main circuit board that all components plug into. Motherboards don't boost FPS directly, but they determine what CPU and RAM models you can use (via socket size - the places you insert your CPU and RAM - and chipset model - how the hardware in your motherboard talks to the rest of your pc).
Motherboards also determine how many hard drives or add-in cards you can install, and what expansion features (USB ports, networking, etc.) are available. Think of it as the backbone that connects everything together.
RAM (Memory):
Random Access Memory is the short-term memory your PC uses to hold data that’s actively being used or processed. In gaming, having enough RAM helps your games and programs run smoothly (we recommend 16GB for a solid gaming PC, though 8GB can suffice for entry-level and 32GB+ for high-end or multitasking builds).
RAM also helps you keep the hundreds of tabs that you've got open running and available at all times, so that you can mod your RPG games with ease.
Storage (SSD/HDD):
This is your long-term storage for games, programs, and files. There are two main types: SSD (Solid State Drive) and HDD (Hard Disk Drive).
SSDs operate much faster, meaning your PC boots quicker and games load in a snap, whereas HDDs are slower but usually offer more storage for the price. If you've got the budget, we recommend using both - many builders use a smaller SSD for the operating system and favorite games, plus a larger HDD for extra storage.
Power Supply Unit (PSU):
The PSU is what feeds power to all your components. It’s crucial to get a quality PSU with enough wattage to support your hardware (and a bit of extra headroom for future upgrades). A good gaming build typically needs somewhere between 500W and 750W, depending on the GPU/CPU.
PSUs might not be the most interesting part of your PC, but don’t neglect to get a good one at the expense of other hardware – a stable power source helps protect your system from outages or surges. In other words, don't fry your top-of-the-line GPU because you got the cheapest PSU possible.
Case (Chassis):
The case is the housing that holds and protects all the components. Cases come in various sizes (full-tower, mid-tower, micro-ATX, Mini-ITX, etc.). A larger case gives more room for big GPUs and elaborate cooling, while a small case saves space but can be trickier to build in (and ITX builds tend to run hotter). Choose one that fits your style and the components (make sure your motherboard size matches the case, e.g., ATX board in an ATX-capable case). Many cases include fans and offer cable management features which make the build cleaner.
Cooling:
To keep your PC running cool and quiet, you’ll need cooling solutions. At minimum, you’ll have a CPU cooler – which can be the stock air cooler that comes with some CPUs or an aftermarket air/liquid cooler – and case fans for airflow. Good cooling prevents overheating during intense gaming sessions. If you plan to overclock or just want a whisper-quiet PC, investing in quality coolers is key.
Operating System (OS):
Lastly, don’t forget you’ll need software to make the PC usable! Most gamers install Windows 10 or 11 as the operating system (or a Linux distro, if you’re into that). You should have a USB drive (8GB or larger) to create an installer for your OS, unless you purchase the OS on a USB.
Along with the parts above, make sure you have a monitor, keyboard, mouse, and any other peripherals you’ll use. Those aren’t part of the build itself, but you’ll obviously need them to interact with your new PC once it’s built.
Insider Tip: If all these components sound a bit overwhelming, Xidax’s Easy Mode builder can do the hard work for you by suggesting a balanced build based on the games you want to play. (More on that later!)
Now that you know what pieces you need, let’s move on to the actual building process.
Step-by-Step: How to Build Your Gaming PC
Time to roll up your sleeves! Building a PC is much easier if you tackle it one step at a time. Here’s a step-by-step walkthrough for assembling your gaming PC:
1. Prepare Your Workspace and Tools
Find a clean, flat surface with plenty of space to lay out your components outside the case. Get a Phillips-head screwdriver, typically #2 size for most PC screws - a magnetic screwdriver is best to not loosing any small parts. If possible, wear an anti-static wrist strap or simply touch a metal part of your case/PSU periodically to ground yourself, so you don't shock your components while building.
Make sure you’re working in a well-lit area (it helps to see tiny connectors). It’s also wise to have small containers for screws (or use the motherboard box as a tray) to keep things organized. Finally, read through any quick-start guides that came with your parts – especially the motherboard manual, which is super useful for connector layouts.
2. Install the CPU onto the Motherboard
Unpack your motherboard and place it on a flat surface (on top of its anti-static bag or cardboard box). If you have an Intel or AMD CPU, locate the CPU socket on the motherboard and open its retention arm/lever. Carefully align your CPU with the socket (there will be a little arrow or marker on one corner of the CPU that matches one on the socket). Gently place the CPU into the socket without forcing it. It should drop in easily when aligned correctly. Close the socket lever to lock the CPU in place.
Tip: Handle the CPU by the edges and avoid touching the gold pins or pads on its underside.
3. (Optional) Install M.2 SSDs
If you have an M.2 solid-state drive (those gumstick-sized SSDs that plug directly into the motherboard), now is a good time to install it while the motherboard is out of the case. Find the M.2 slot on the board (consult the manual, some boards have multiple slots). Remove the tiny screw at the end of the slot, insert the M.2 drive at an angle into the slot, and then screw it down to secure it. This gives you super-fast storage right on the board.
4. Install the CPU Cooler
Your CPU needs a cooler attached before you run the system. The process will differ depending on whether you have a stock air cooler or an aftermarket cooler (air or liquid). If it’s a simple air cooler: apply a pea-sized drop of thermal paste in the center of the CPU (unless the cooler already has paste pre-applied), then position the cooler over the CPU and screw or latch it in according to the instructions. Make sure it’s snug. If it’s a liquid cooler with a radiator, you might wait to mount the radiator to the case a bit later, but you can still attach the water block to the CPU now.
Tip: Don’t forget to plug the cooler’s fan or pump cable into the motherboard CPU_FAN header! This ensures your motherboard can control the cooler and avoid overheating.
5. Install RAM (Memory) Modules
Next, take your RAM sticks and insert them into the RAM slots on the motherboard. If you have two sticks and four slots, check the motherboard manual for the correct slots (often you’ll use slot 1 and 3 or 2 and 4 for dual-channel operation). Open the retention clips on the slots, line up the notch on the RAM stick with the notch in the slot, and press the RAM firmly down until the clips snap back into place. Make sure each module is fully latched.
Tip: It's common for new builders to handle hardware delicately, but sometimes more force is needed to ensure parts are properly seated. Check alignment twice, then listen or feel for the "click" to know it's done right.
6. Mount the Motherboard into the Case
Now it’s time to put that motherboard (with CPU, cooler, RAM, M.2 installed) into your case. First, ensure the case has the motherboard standoff screws installed in the correct holes (these are little raised mounting posts where the motherboard will screw in – they should line up with the holes in your board). If your case’s I/O shield (the metal plate that covers your USB ports, ethernet, and other connections) is separate, snap it into the case’s back opening before installing the motherboard. Carefully lower the motherboard into the case, aligning the ports with the I/O shield and the screw holes with the standoffs. Use the provided screws to secure the motherboard to the standoffs. There are usually 6-9 screws depending on the board size.
Tip: Avoid overtightening these screws; just snug enough to hold the board firmly. You risk bending or cracking your motherboard if you go too tight, which can impact performance.
7. Install the Power Supply (PSU)
Next, grab your power supply. In most modern cases, the PSU mounts at the bottom rear. Orient the PSU so its fan (if it has one) faces outwards (downward through a mesh or upward into the case depending on the case design and whether it has a vent at the bottom). Slide the PSU into place and secure it with the four screws that align with the back of the case. Ensure the PSU’s power switch is turned off for now. If your PSU is modular (detachable cables), plug in at least the main 24-pin motherboard cable and the CPU 4+4 pin (8-pin) cable, since you know you’ll need those.
8. Connect Power Cables
Now that the PSU and motherboard are in, connect the PSU cables to the motherboard. Attach the 24-pin ATX power cable to the big socket on the motherboard (provides power to the board) and the 8-pin CPU power cable to the socket near the CPU (often up top on the board). These connectors are keyed to only go in one way – press them in firmly until the latch clicks. It’s easy to forget the CPU power cable (it’s a common mistake!), so double-check that it’s plugged in; otherwise the PC won’t boot.
You can also plug in any case fan cables to the motherboard fan headers at this point (or into a fan hub or directly to PSU if they use Molex/SATA connectors). Cable management isn’t critical yet, but you can start routing cables through case cutouts to keep things tidy.
9. Install the Graphics Card (GPU)
Now for the beefy graphics card. Identify the correct PCIe x16 slot on the motherboard (typically the top slot). You’ll likely need to remove one or two expansion slot covers on the case’s rear where the GPU’s outputs will go. Unscrew and remove those covers. Then, holding the GPU by its edges, align it with the slot and the rear opening, and firmly press it into the PCIe slot until it clicks in. The slot has a small latch that should lock the card in place (make sure it locks). Secure the GPU to the case with the screws where you removed the slot covers, so it doesn’t move. Finally, connect the PCIe power cables from your PSU to the GPU (if your card requires external power, which most gaming cards do). These are usually 6-pin or 8-pin (or combos like 6+2) connectors. Like before, they only plug in one way; push until secure.
Tip: Watch for any bent pins as you plug in these connectors. Check alignment twice before inserting.
10. Install Storage Drives
If you have any 2.5” SSDs or 3.5” hard drives in addition to (or instead of) an M.2, now install them in the case. Most cases have dedicated drive bays or brackets. Mount the drive using the provided screws or tool-less mechanism (for 3.5” HDDs often tool-less trays, for 2.5” SSDs you may screw them to a bracket). After mounting, connect a SATA data cable from each drive to a SATA port on the motherboard, and connect a SATA power cable from the PSU to each drive. These cables are keyed; just be gentle and ensure they’re fully seated.
11. Connect Front Panel Cables and Other Peripherals
This step involves plugging in the case’s front I/O cables (power button, reset button, USB ports, audio jacks, etc.) to the motherboard headers. This part can be a bit fiddly because the connectors are small – refer to your motherboard manual’s diagram for the exact pins (often labeled “F_PANEL” or similar). Typically, you’ll connect: power switch, reset switch, power LED, hard drive LED, front panel audio (to the HD_AUDIO header), and front USB (to a USB 2.0 or 3.0 header). Take your time and double-check the polarity for LEDs (the tiny + and –) as indicated in the manual. It’s not the end of the world if you mix up LED wires – the lights just won’t work – but switches need to be correct to function. Once these are in, also hook up any USB 3.0 front-panel cable (a thick cable to a 20-pin header) and front USB-C if your case has one (to the USB-C header).
12. Double-Check Everything
At this stage, most of the assembly is done. It’s wise to do a final pass: Is the CPU cooler firmly mounted and plugged in? Is the RAM fully seated? Motherboard screwed down? GPU latched and powered? All necessary power cables (24-pin, CPU 8-pin, GPU, SATA) connected? Front panel wires connected? Also, ensure no stray screws or wires are stuck in fans or laying on the motherboard. If all looks good, you can tidy up cables using zip ties or twist ties so that they’re out of the way of fans and panels – this helps with airflow and aesthetics.
Tip: Don't leave cables as a tangled mess in your PC, especially if it's air cooled. Not only will your build look better, it will run cooler, and you'll be happy you spent a little time getting things organized.
13. Power On and Install the Operating System
The moment of truth is here! Attach your monitor to the GPU (use HDMI/DisplayPort, etc.), and plug in your keyboard and mouse. Double-check that the PSU is switched on (and your monitor too). Press the power button on the case. With any luck, you’ll hear fans spin up and see something on the screen – usually the motherboard’s logo or BIOS screen. If nothing happens, turn off and recheck cables (common misses are the power button connector or the CPU power cable). If it starts, congrats – the hardware build is successful! Now you need to install your operating system.
For Windows, download the Windows 10/11 installation media from Microsoft onto a USB drive (if you haven’t already prepared one). Plug the USB in and follow the on-screen prompts to install Windows on your new PC. This will involve choosing your SSD or HDD, creating a partition, and letting the installer run. Once the OS is installed, you’ll want to install your drivers (especially graphics card drivers from NVIDIA/AMD or chipset drivers from the motherboard’s support site) to ensure everything runs optimally.
After that, you’re ready to install some games and enjoy your brand-new custom gaming PC!
Building a PC step-by-step really is a great way to learn how each component works together. Take it slow, follow the steps, and you’ll go from a pile of parts to a working machine in just an afternoon.
Common Mistakes to Avoid
Even seasoned builders slip up occasionally. For first-timers, being aware of common pitfalls can save a lot of headaches. Here are some common mistakes to watch out for (and avoid):
-
Skipping the Standoffs: Always use the motherboard standoff screws in the case. These little posts keep the motherboard from touching the case metal. If you forget them, you could short out your board. Double-check that each motherboard screw is going into a standoff, not directly into the case tray.
-
Incorrect CPU Installation: Align the CPU correctly with the socket (remember that tiny triangle marker). Forcing a CPU in the wrong way can bend pins (especially on AMD CPUs) or damage the socket. If it’s aligned, it should seat with very little pressure.
-
Too Much (or No) Thermal Paste: When mounting the CPU cooler, use an appropriate amount of thermal paste. Too little can lead to poor heat transfer; too much can spill over the edges. A pea-sized dot or thin line in the center of the CPU is generally perfect. (Most coolers come with paste pre-applied or a tube included, but you can also get your own.)
-
Loose RAM or GPU: If your system doesn’t boot on first try, one of the most common causes is unseated RAM or GPU. Make sure you firmly clicked in the RAM sticks and that the GPU is fully inserted and latched. They can require more pressure than expected.
-
Forgetting Power Cables: Another classic mistake is forgetting to plug in all the power connectors. That means the 24-pin main connector and the 4/8-pin CPU power on the motherboard, and any required PCIe power cables to the graphics card. Missing one of these will prevent power-up or cause the GPU to not work.
-
Not Managing Cables: While it doesn’t affect performance, poor cable management can block airflow or get cables snagged in fans. Take a few minutes to route cables neatly and tie them down. This will keep your build running cooler and make it easier to work on later.
-
Ignoring Compatibility: Ideally, you’ve checked compatibility before buying parts. But just in case, remember things like: your motherboard must support your CPU (correct socket and chipset); your RAM type (DDR4, DDR5) must match the motherboard; your PSU must have enough wattage and the right power connectors. If you use a tool or configurator (like Xidax’s builder) this is usually handled for you, but it’s worth noting.
-
No Anti-Static Precautions: While it’s rare to kill parts with static, it’s still a risk. Ground yourself by touching metal or wear an anti-static strap when handling sensitive components. It’s a simple step to avoid frying a part without knowing it.
By keeping these in mind, you’ll avoid the most frequent frustrations new builders face. And if you ever feel stuck, remember that there are countless resources, forums, and videos online – and of course, Xidax’s own tech support is just a call or chat away to help with build questions.
Why Customize with Xidax?
You’ve learned the basics of building a PC – awesome! But maybe you’re feeling a bit overwhelmed by all the parts and steps, or you’re excited about PC gaming but not so keen on physically assembling everything yourself. That’s where Xidax comes in. We’re here to bridge the gap between do-it-yourself and done-for-you, offering the best of both worlds: customization without the stress.
Here are a few reasons to consider customizing your gaming PC with Xidax (your friendly PC building experts):
-
“Easy Mode” Configurator for Newbies: If choosing parts feels daunting, our Easy Mode PC Builder is built just for you. It simplifies the process by letting you select a PC based on your favorite games and desired performance. You just input what games you play and your budget, and Easy Mode will suggest a rig that can run those games smoothly at the resolution you want. It’s like having a cheat sheet for PC building – no deep technical knowledge required. Gaming is hard, but buying a PC shouldn’t be! (Go ahead and give Easy Mode a try – it’s actually fun to see the recommendations.)
-
Full Customization for Enthusiasts: Are you the type who knows exactly what you want – down to the model of graphics card or the brand of RAM? Xidax offers full customization options for gaming desktops and laptops. You can pick every component through our configurator – from the case, CPU and GPU, all the way to custom sleeved cables and RGB lighting. Unlike buying a fixed pre-built, you’re in the driver’s seat. We even let you include custom laser engraving or designs on your PC case. Your dream PC will truly be one of a kind.
-
Expert Guidance and US-Based Support: One thing that sets Xidax apart is our people. We’re gamers and PC enthusiasts ourselves, and we love helping others build their perfect system. If you have questions at any stage – whether you’re unsure about compatibility or need setup help – our real, US-based customer support is here for you. In fact, our team will happily walk you through options (via phone or chat) before you buy, so you get exactly what you need. Consider us your personal tech gurus. (Insider tip from our team: don’t hesitate to use this resource – we can often suggest a tweak or two to get even more performance for your budget!)
-
Quality Assembly and Testing: When you order a custom PC from Xidax, our professional builders assemble it for you with meticulous care. We handle all the wiring, mounting and installation, so you don’t have to worry about the little details. Every machine goes through thorough testing and a burn-in process to ensure it’s 100% stable and ready to game on arrival. Essentially, we do the “build stress” and you get the fun part – unboxing and playing.
-
Lifetime Parts andamp; Labor Warranty: Perhaps the biggest perk of going with Xidax is our industry-leading warranty. We stand by our builds with an unrivaled lifetime parts and labor warranty on select custom desktop PCs. That’s right – we will support your system for life. This kind of confidence is something you won’t get if you DIY or even from most other companies (our competitors think we’re crazy, but we believe in our product!). It means you can game with peace of mind, knowing we’ve got your back if anything ever goes wrong.
-
Ongoing Support andamp; Community: Beyond the purchase, we continue to support you. Need help overclocking, or want advice on a future upgrade? Have a troubleshooting question a year down the line? We’re here to help for as long as you own your Xidax PC. We’ve built PCs for everyone from NASA engineers to pro gamers, but our favorite customer is you – the gamer who just wants a reliable, awesome rig. Check out our reviews and you’ll see shout-outs to individual team members who go above and beyond. We pride ourselves on that personal touch.
- Flexible Financing: With Xidax, you can easily customize your gaming PC to fit your needs and budget. Our flexible payment plans allow you to get the high-performance system you desire without the upfront financial burden. When you choose to buy now and pay later through Affirm, you can select a repayment plan that works for you, with transparent terms and no hidden fees. Alternatively, our lease-to-own option with Progressive Leasing provides an accessible way to start gaming right away. You can enjoy your new PC while making manageable payments over time, ultimately owning your gaming setup outright.
In short, Xidax lets you enjoy all the benefits of a custom-built gaming PC without any of the potential pain points. You can be as involved or hands-off as you want: design your PC and let us handle the heavy lifting (literally and figuratively). It’s perfect if you’re short on time, or if you read through the build steps above and thought “wow, that’s cool but I’m not totally confident.” We’ve got you!
Final Thoughts
Building your own gaming PC is an experience every gamer should try at least once. It can be empowering, educational, and yes – a lot of fun. By understanding the components and following a step-by-step approach, you’ll find that a PC isn’t a mysterious box but a collection of parts that you can assemble and customize. And whether you decide to build it all yourself or have experts like Xidax help you out, the end result is the same: a powerful gaming machine tailored to your needs.
So, are you ready to get started on your dream gaming rig? If you’re feeling excited and confident, go for it – pick out your parts and enjoy the build journey. And remember, help is always available: guides, communities, and Xidax’s own support team are a click away if you get stuck.
If you’d rather skip straight to gaming on a custom rig without the assembly, that’s perfectly fine too. You can use our Easy Mode PC Builder to effortlessly configure a system in minutes, or dive into the details and build your own gaming PC for maximum control. Either way, you’ll end up with a PC built to handle the games you love, with the backing of Xidax’s warranty options and support.
Happy building, and welcome to the PC Master Race! Whether you build it yourself or build it with Xidax, soon you’ll be leveling up in-game on a beast of a machine that you can proudly call your own. Now, let’s play!